

API Keys
API keys give machines access to your organization without a browser login, which covers CI/CD pipelines, the CLI and AI agents via MCP. Each key carries its own set of permissions and can be restricted to a single project, so you can grant exactly the access an integration needs and nothing more.
API keys live under Settings → API Keys. Managing them requires the org:manage-security permission (Admins and Owners), and creating a key requires that your own email address is verified.
Creating an API key
- Click Create Key.
- Enter a Name that identifies the integration (e.g. "GitHub Actions CI").
- Choose an Expiration of Never, 30 days, 60 days, 90 days, 180 days or 1 year.
- Configure Permissions (see below).
- Click Create Key.
The full key is displayed once, immediately after creation, so copy it and store it securely in a CI secret, a password manager or an environment variable. It will not be shown again, so if you lose it, revoke the key and create a new one.
Keys start with the rb_live_ prefix. In the key list, only this short prefix is shown, never the full key.
Permissions and project restriction
Every key is either full-access or scoped:
- Full Access is the default, and it grants unrestricted access to all permissions and projects.
- Granular scopes appear when you turn the Full Access switch off, so you can tick individual permissions grouped by area. The groups are Projects, API Specs, Testing, Security, Mock Server, Documentation, Monitoring, Notifications, Billing and Organization. These are the same permissions used by roles, such as
specs:read,tests:executeanddocs:manage-portal.
For each selected permission you can additionally choose All Projects or restrict it to a single project. A key scoped to one project cannot touch the rest of your organization, no matter what the caller asks it to do.
A scoped key needs at least one permission selected.
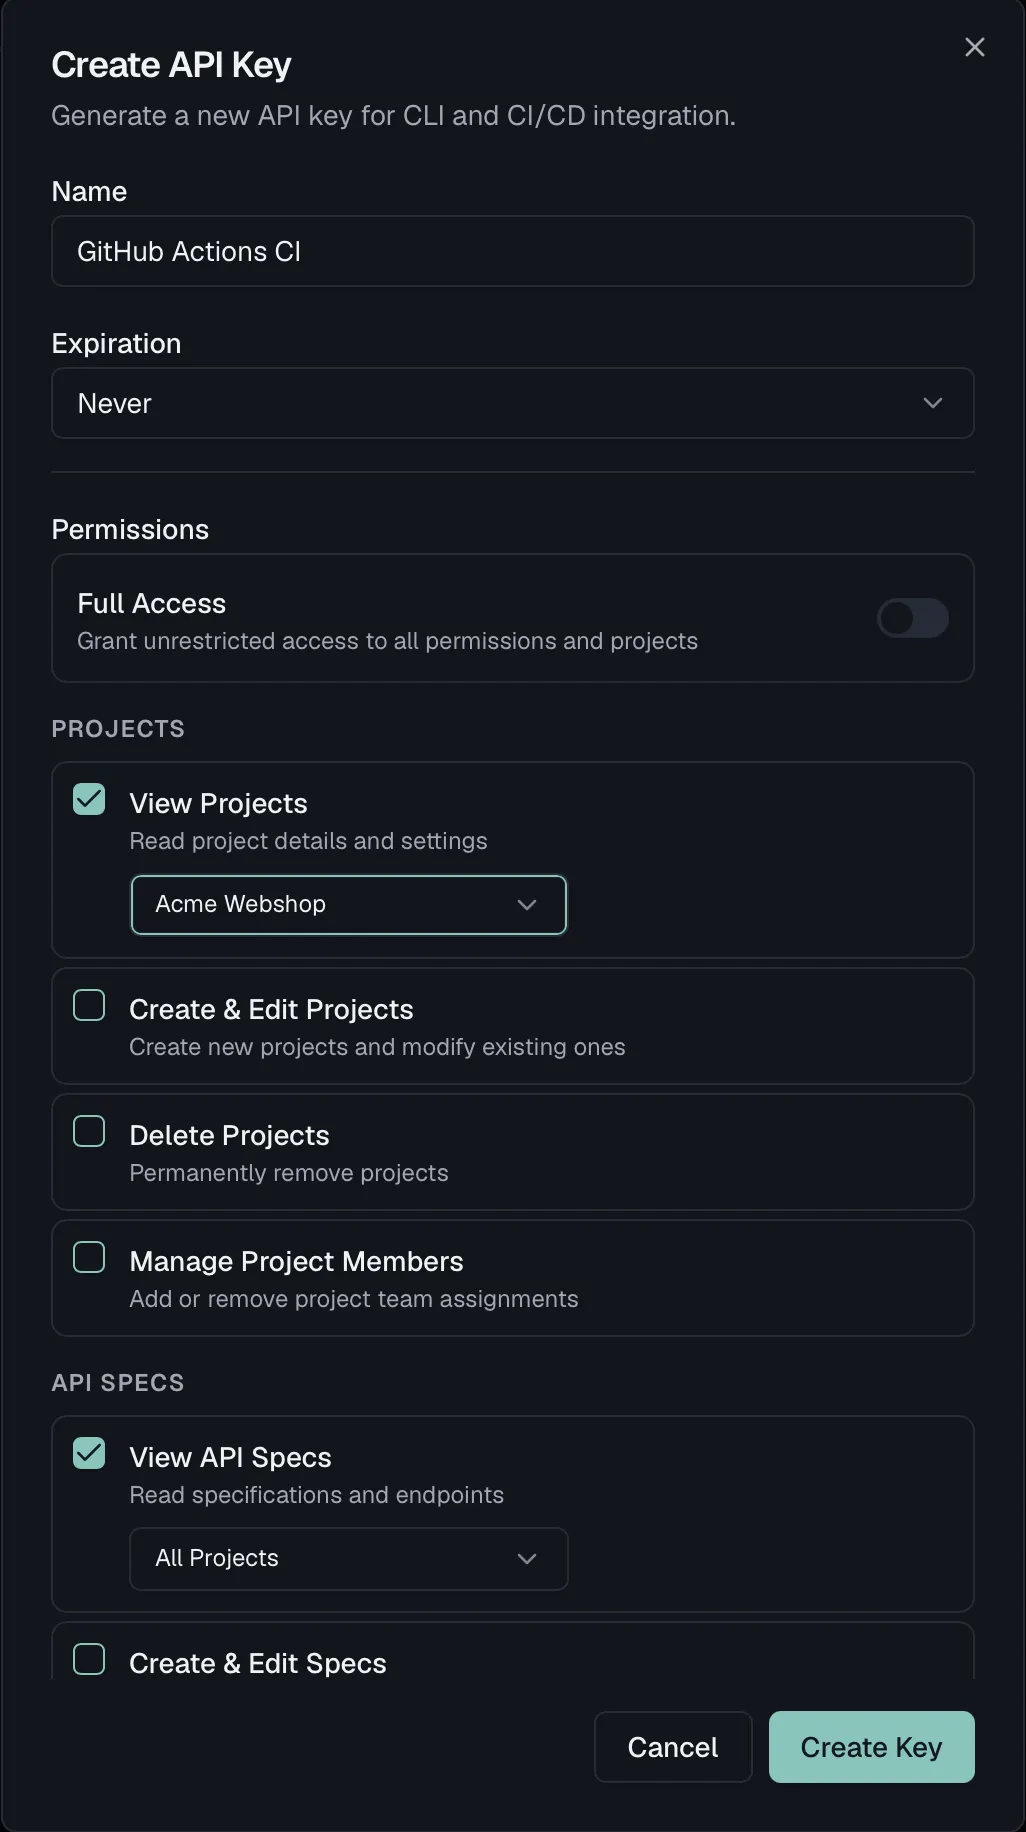
Grant the least privilege that gets the job done, so start read-only and add write scopes only when the integration actually needs them.
Managing existing keys
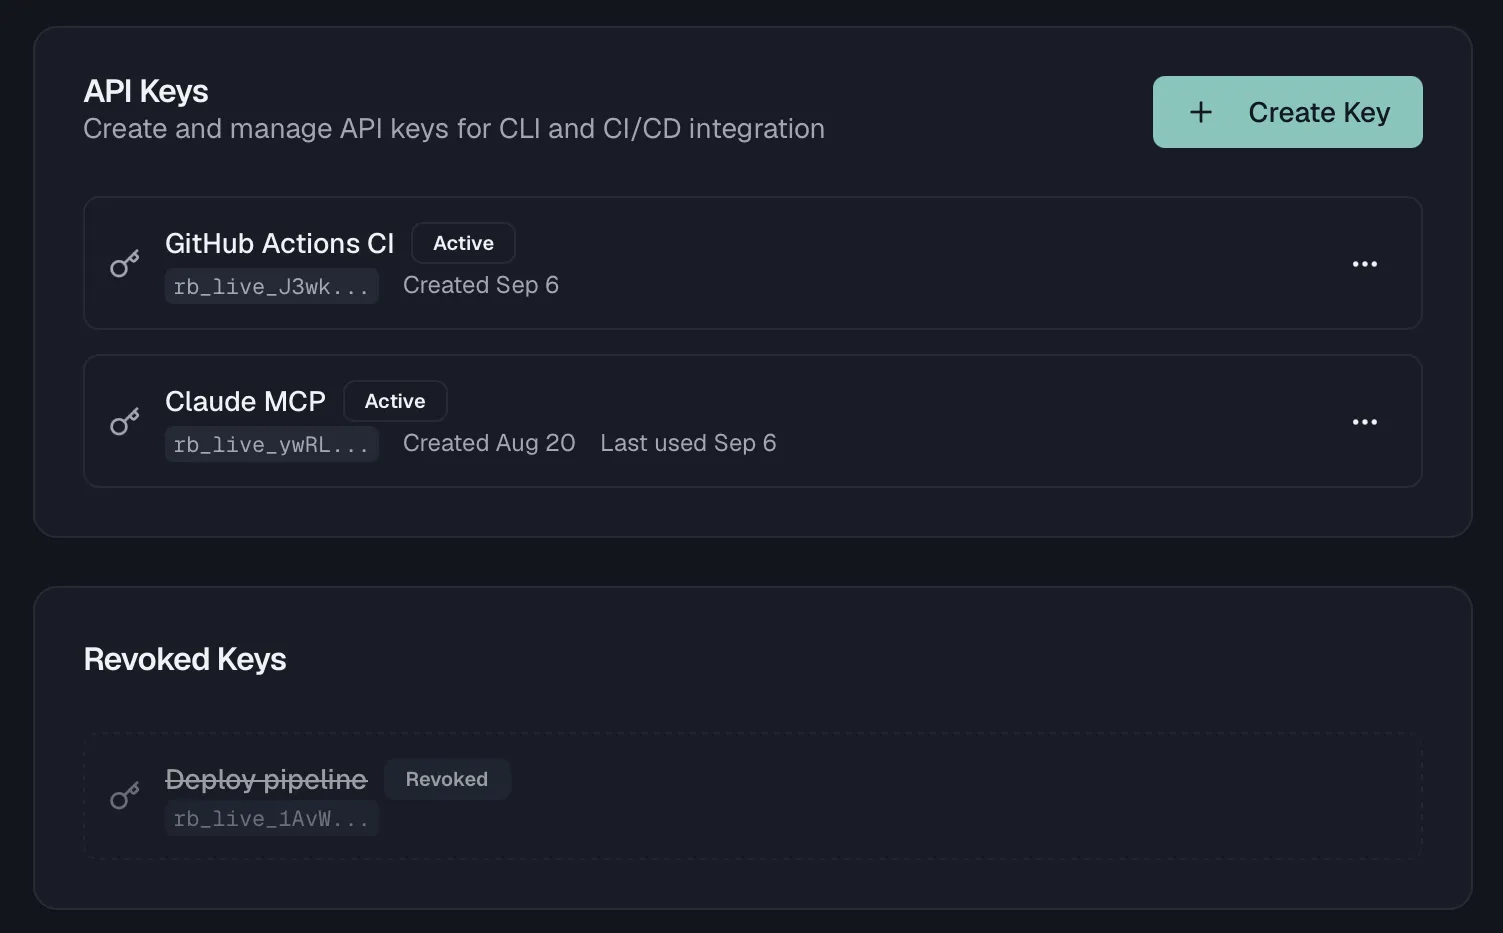
The key list shows each active key's name, prefix, creation date, expiry date (if set), and when it was last used. From a key's ⋯ menu:
- Edit Permissions changes the key's scopes at any time without re-issuing it. Switch between Full Access and granular scopes, add or remove permissions, and adjust project restrictions. Changes take effect immediately.
- Revoke permanently disables the key. Any applications or pipelines using it immediately lose access. This cannot be undone.
Revoked keys move to a separate Revoked Keys list so you keep an audit trail of what existed.
Where API keys authenticate
An API key authenticates against the same API surface in two ways:
- REST API access works by sending the key as an
X-API-Keyheader on requests tohttps://api.routebase.dev. - MCP (AI agents) use the Routebase MCP server, which accepts the same header on
https://mcp.routebase.dev. When you use the stdio CLI you can set theROUTEBASE_API_KEYenvironment variable instead. Tool discovery and every tool call are checked against the key's scopes. See MCP Authentication and the MCP Quickstart.
What the REST API covers
The API Reference section of these docs lists the endpoints Routebase commits to. Those are the ones the test CLI, the GitHub Action and SCIM identity providers already call, so build your own integrations against them.
Everything else under /api/ exists for the Routebase web app. Those paths can change or disappear without notice, so treat them as internal even though a key with matching scopes reaches them today.
Good hygiene
- Never commit keys, and keep them in CI secrets or environment variables.
- Set an expiry where your workflow allows it, and rotate keys regularly.
- One key per integration, so revoking one doesn't break the others, and "last used" tells you what's still alive.
- Revoke immediately if a key is exposed, then create a replacement.
Related
- API Reference — the endpoints an API key can call
- MCP Authentication — scopes and key handling for AI agents
- MCP Quickstart — connect an AI agent to Routebase
- Roles & Permissions — the permission model behind key scopes
- Audit Log — trace security-relevant activity in your organization