

Scan Profiles
A scan profile is a reusable security-scan configuration. It names the target environment and API specification, selects which scanners run, assigns personas to the scanners that need them, and sets the rate limits. You run a profile on demand or give it a schedule to run automatically. Profiles live on the Scan Profiles page in the Security area.
For the surrounding workflow of scan runs, findings and scoring, see the Security overview.
Permissions
| Action | Permission |
|---|---|
| View profiles | security:read |
| Create, edit, delete profiles | security:write |
| Run a profile | security:execute |
Members can see the list but the Create Profile, Edit, Run and delete controls are hidden for them.
The profile list
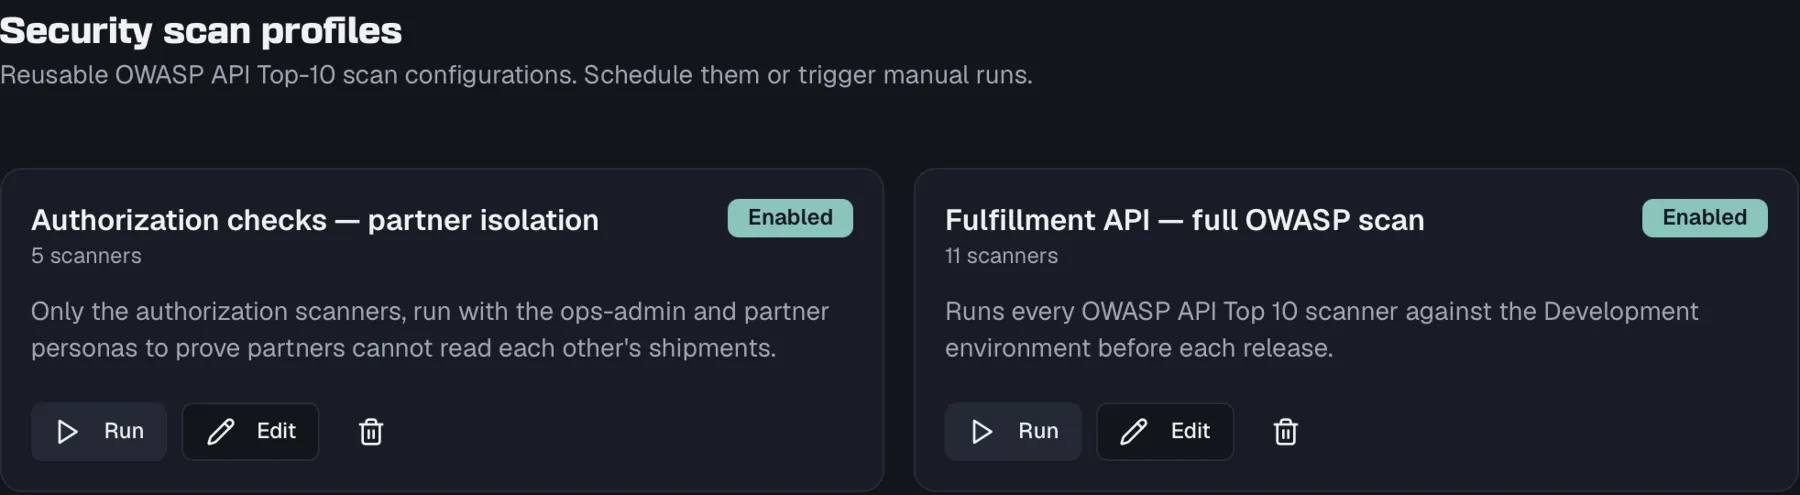
Each profile is shown as a card with its name, the number of enabled scanners, an Enabled / Disabled badge, its description, and its schedule (if any). The card's actions are Run, Edit and delete. Run is disabled while a profile is disabled.
Creating a profile
Click Create Profile to open the editor. It has three sections when creating, and a fourth section for schedule and notifications appears once the profile exists.
Profile
| Field | Description |
|---|---|
| Name | Required. A descriptive label, e.g. "Nightly OWASP baseline". |
| Description | Optional free text. |
| Target environment | Required. The environment whose base URL the scan runs against. |
| API specification | Required. Which spec's endpoints the scanners test. |
The target environment must have a base URL, and its API must be running and reachable from Routebase for a scan to produce results.
Scanners
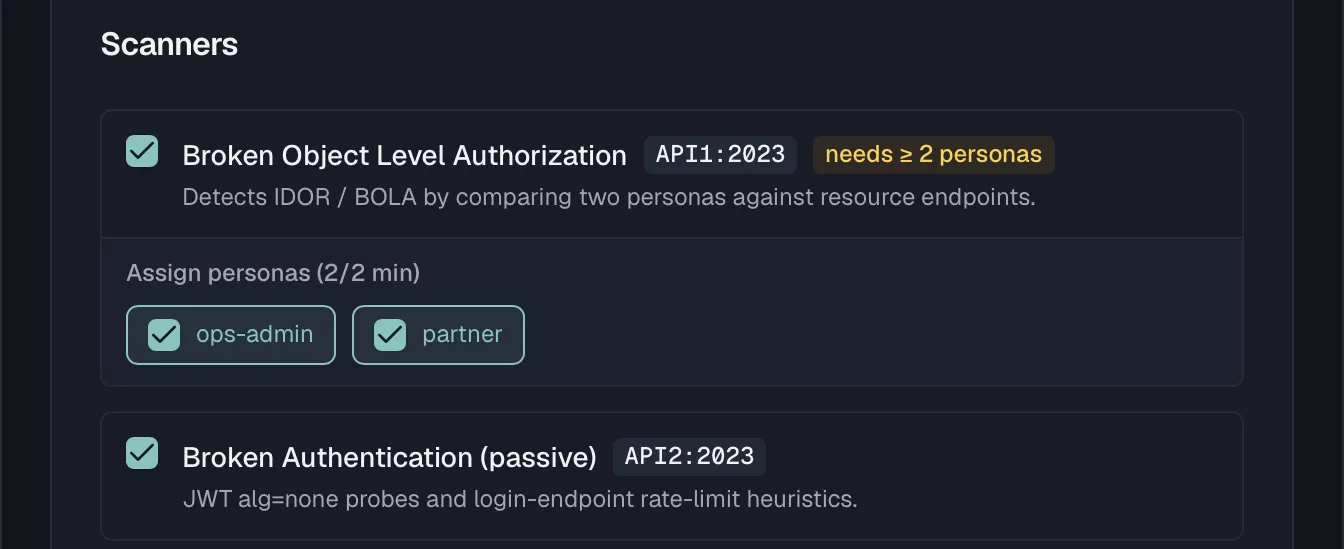
Enable the scanners you want by ticking their checkboxes. Each row shows the scanner name, its OWASP category and, for scanners that need personas, a badge indicating how many. You must enable at least one scanner.
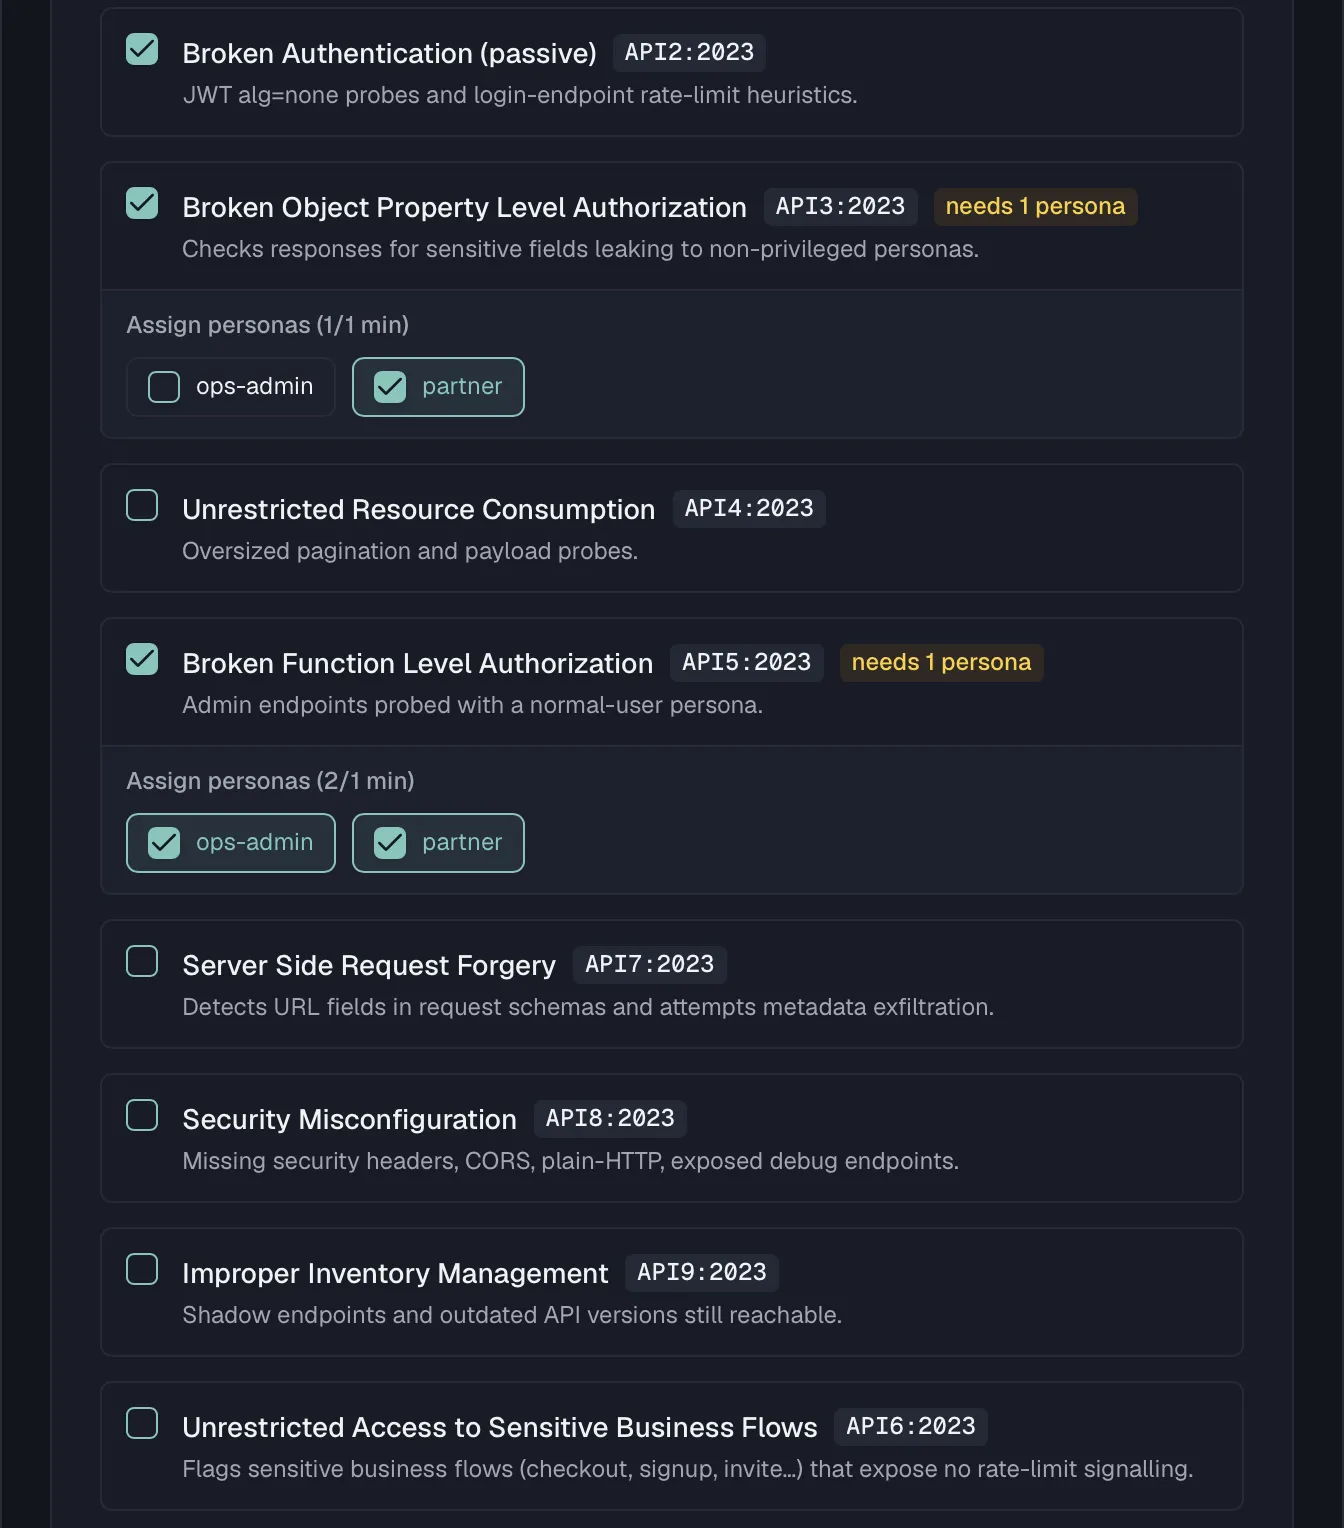
Scanners that require personas (api1-bola, api1-bola-enum, api3-property-auth, api5-bfla) behave specially:
- If the project has no personas, those rows are locked with a link to configure personas first.
- Once personas exist and you enable such a scanner, a persona picker appears under it. Assign personas by ticking them, and the picker shows how many you've assigned against the minimum.
api1-bolaandapi1-bola-enumeach need at least 2, whileapi3-property-authandapi5-bflaeach need at least 1.
The editor won't let you save if an enabled persona-requiring scanner has fewer personas assigned than its minimum. Persona assignments are stored by persona name, which is why renaming an in-use persona breaks a profile.
Rate limits
Control how hard the scan hits the target:
| Setting | Default | Range | Meaning |
|---|---|---|---|
| Max concurrent requests | 5 | 1–50 | How many requests are in flight at once. |
| Request delay (ms) | 200 | 0–10000 | Minimum delay between consecutive requests. |
| Time budget (seconds) | 600 | 30–3600 | Maximum wall-clock time for the scan. |
Lower concurrency and a higher delay are gentler on the target, so use conservative values for anything close to production. When the time budget is reached, the scan stops and saves the results it has.
The same section carries three settings that tune specific scanners:
| Setting | Default | Meaning |
|---|---|---|
| Max probe payload (KB) | 1024 (1 MB) | Size of the oversized-body probe the api4-resource-consumption scanner sends. Configurable from 1 KB up to 10 MB. |
| Enable rate-limit probe | Off | When on, api4-resource-consumption also fires a short burst of requests at the first collection endpoint to check for missing rate limiting. Off by default because a burst can stress a shared target, so only enable it against environments you own. |
| Fuzzing intensity | Off | Gates the two fuzzing scanners (fuzz-schema, fuzz-mutation). At Off they send no requests even when selected. Low, Medium and High progressively enable more payload classes and a larger per-scan request budget. Because fuzzing fires many mutated requests, only raise this against environments you own. |
Selecting a fuzzing scanner alone does nothing until Fuzzing intensity is above Off, because the two settings work together. See the Scanner reference for what each fuzzer probes.
Click Create profile to save. The new profile starts enabled with no schedule.
Scheduling and notifications
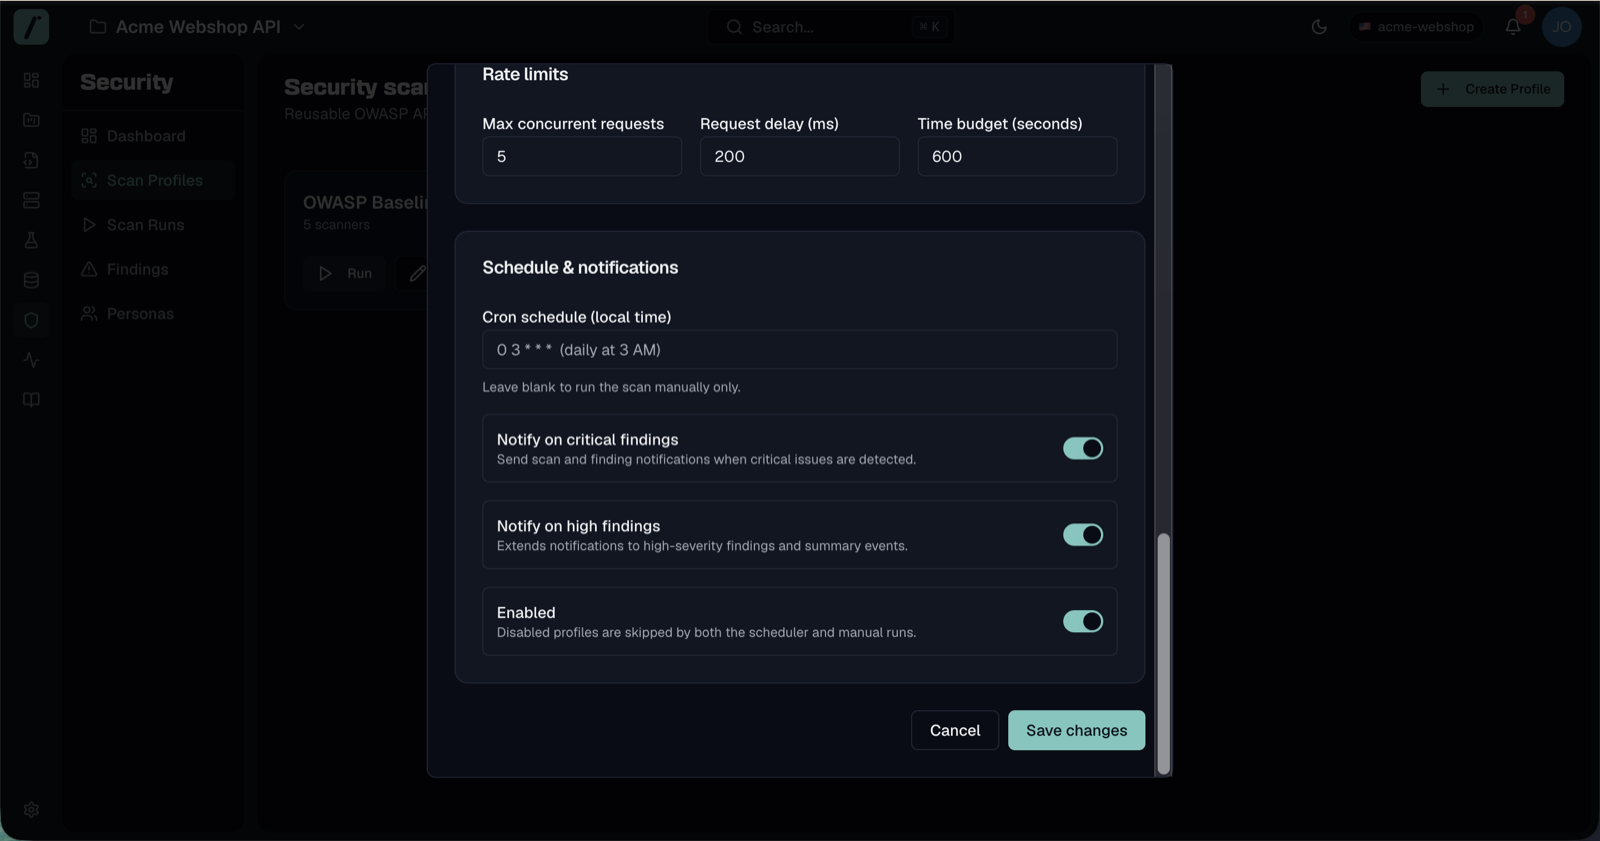
Scheduling and notification settings are only available when editing an existing profile, so they don't appear in the create form. The pattern is to create the profile and then reopen it with Edit to add a schedule or change notifications.
The Schedule & notifications section has:
| Setting | Description |
|---|---|
| Cron schedule (local time) | A cron expression, e.g. 0 3 * * * for daily at 3 AM. Leave blank to run the profile manually only. The expression is validated on save. |
| Notify on critical findings | Send scan and finding notifications when critical issues are detected. |
| Notify on high findings | Extend notifications to high-severity findings and summary events. |
| Enabled | When off, the profile is skipped by both the scheduler and manual runs. |
Scheduled runs use the same settings as a manual run and appear in the same scan history. Deleting a profile also removes its recurring schedule.
Running a profile
To run a scan manually, click Run on an enabled profile (requires security:execute). The scan is queued and you're taken to the live scan run view, which updates automatically while the scan progresses and lets you cancel it. A profile that is disabled can't be run, so enable it first.
Editing and deleting
- Edit reopens the full editor, including the schedule and notifications section.
- Delete removes the profile and its schedule after a confirmation prompt. Past scan runs and their findings are kept.
Limits
How many scan profiles a project can hold depends on your plan, with 10 on Pro and unlimited on Enterprise. That covers separate environments and scan strategies such as a quick smoke profile and a full nightly profile. Creating one past the limit is rejected, so delete an unused profile to make room.
Related
- Security overview — scan runs, findings, and the security score
- Scanner reference — what each scanner you enable actually checks
- Security personas — the identities you assign to authorization scanners
- Security in CI/CD — running a profile from a pipeline instead of a cron schedule
- Environments — the scan target's base URL