

Parameters
Parameters are the inputs an endpoint accepts alongside its request body. Each parameter has a location that tells a client where to put the value, a type that describes its shape, and a flag for whether it's required.
Parameter locations
| Location | Where it goes | Example |
|---|---|---|
| Path | Inside the URL itself, matching a {variable} in the endpoint path |
/users/{id} → id |
| Query | After the ? in the URL |
/users?role=admin → role |
| Header | An HTTP request header | X-Request-Id |
| Cookie | A cookie sent with the request | session_id |
| Query string | The whole query string as one value, available in specifications written as OpenAPI 3.2 | /search?foo=a+b&bar=true → filter |
Path parameters are always required, because the URL is meaningless without them. Routebase enforces this by setting the required flag automatically when you switch a parameter's location to Path. Query, header and cookie parameters are optional unless you mark them required.
A Query string parameter describes the entire query string instead of one pair in it, so an endpoint has at most one of them and no query parameters beside it. Its type is always an object. In place of the type you pick the content type that the client encodes the object with, which is application/x-www-form-urlencoded by default and can also be application/json or text/plain. Routebase rejects a second query string parameter and a query parameter next to one, because the OpenAPI specification forbids both.
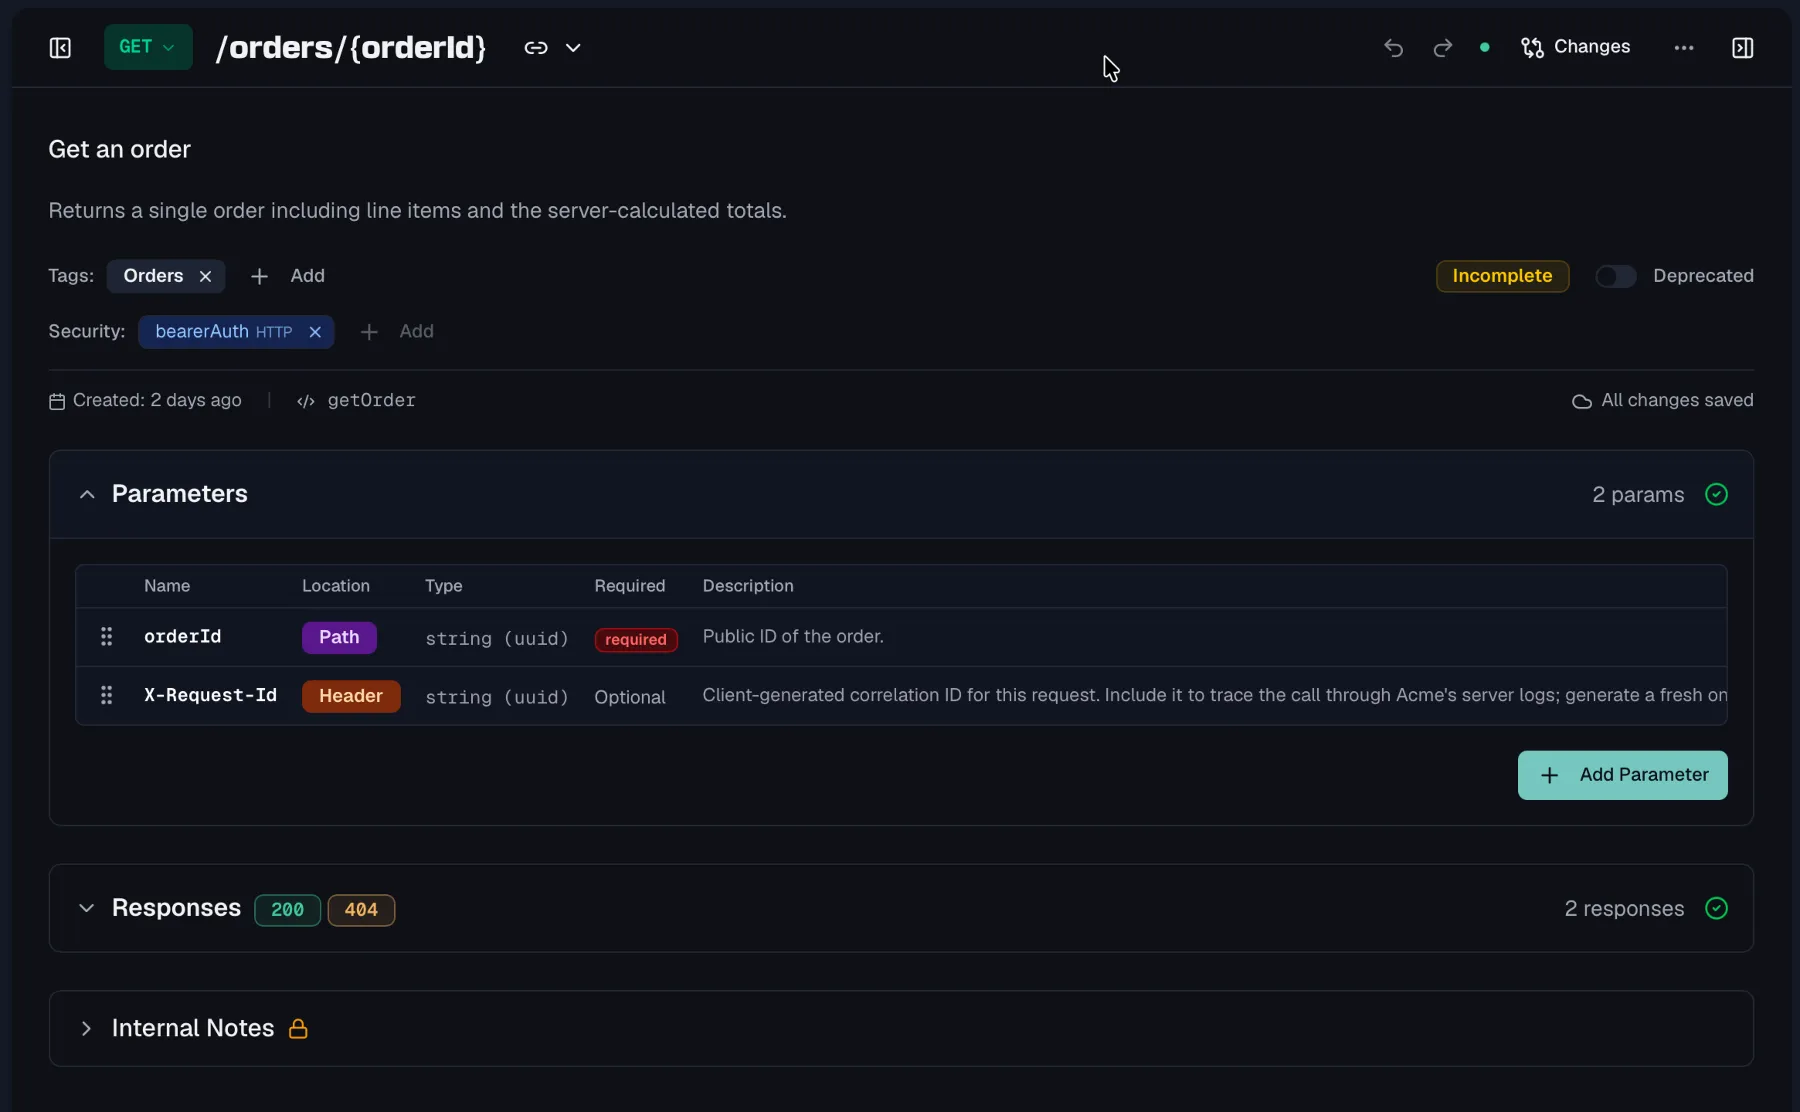
Path parameters stay in sync with the URL
Path parameters are detected automatically from {variable} placeholders in the endpoint path. Add {id} to the path and the id parameter appears in the table. Remove it from the path and the parameter is removed again. If a parameter about to be removed carries extra data such as a description, format, example or default value, Routebase asks first. The Remove Path Parameters dialog lists what would be lost, so Cancel keeps the parameters and Remove deletes them.
Adding a parameter
- Open an endpoint and expand the Parameters section.
- Click Add Parameter.
- Set the Name, Location (Path, Query, Header, Cookie, or Query string in a 3.2 specification), and Type.
- Optionally add a Format, Description, Example, and Default Value, and toggle Required.
Type and format
Give every parameter a type, which is String, Integer, Number, Boolean, Array or Object. You can refine a type with an optional Format hint such as int32, date-time, uuid or email, which tells consumers and code generators exactly what to expect.
Add a Default Value for optional parameters and an Example to make your documentation concrete and your mock responses realistic. These live in the parameter's Advanced Settings popover in the table, and a highlighted icon shows when advanced settings are configured.
On an OpenAPI 3.2 specification the popover also offers a Serialized example, which is the same value as it appears on the wire, such as a percent-encoded query value. The export then writes an Example Object with the example as dataValue and the serialized form as serializedValue, and the documentation portal shows both.
Style and explode
The same popover holds the OpenAPI Style and Explode fields, which describe how a client serializes an array or object value. Each location offers the styles the OpenAPI specification allows for it. A path parameter can use simple, matrix or label, and a query parameter form, spaceDelimited, pipeDelimited or deepObject. A header parameter uses simple, and a cookie parameter form or, in a 3.2 specification, cookie. Both fields default to what OpenAPI assumes when they are absent, and Routebase only writes them to the exported document when you set them, so a specification stays as compact as the one you imported. An imported document keeps the styles it declares.
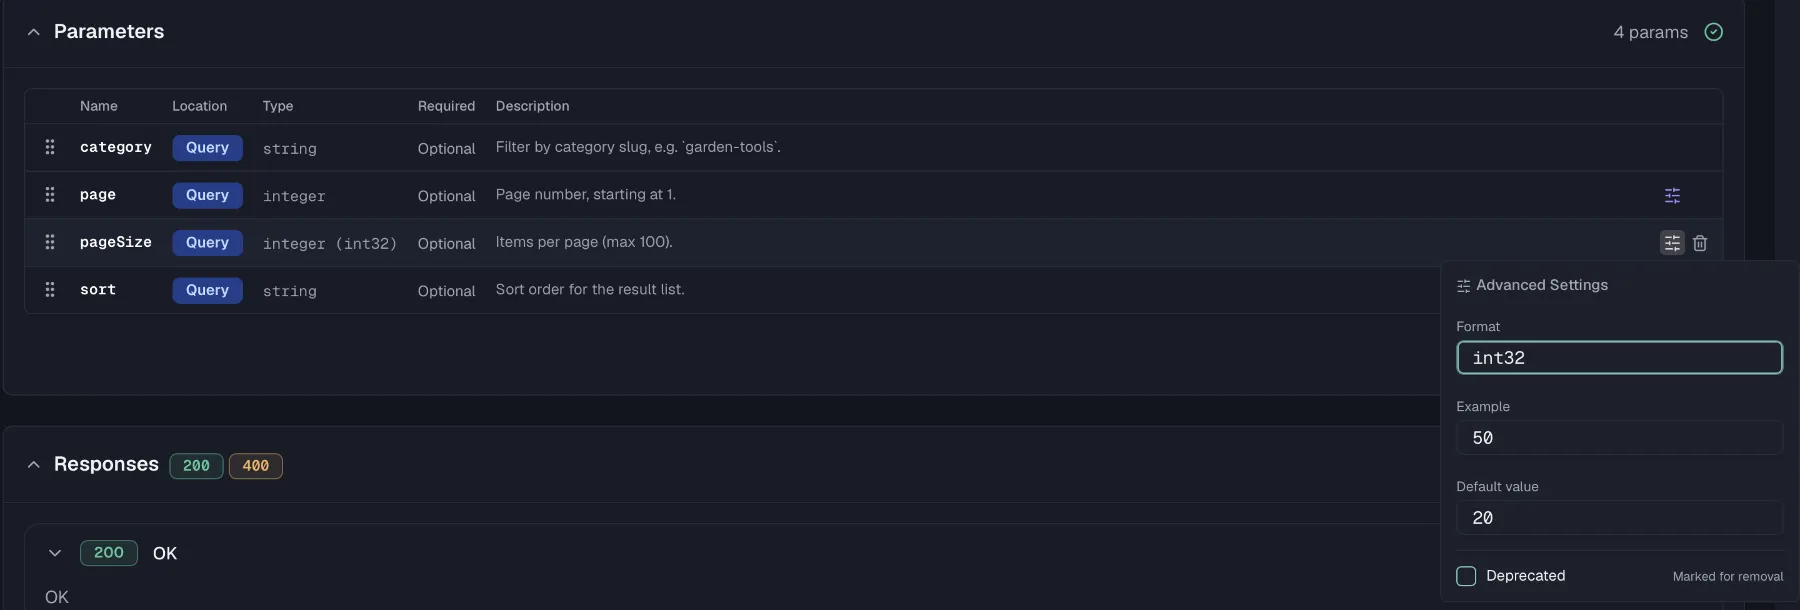
Editing in the table
The parameter table is built for fast, inline editing:
- Double-click a row to edit it in place. Enter commits, Escape cancels.
- Arrow keys commit the current row and move to the parameter above or below, and Tab on the last row's description creates a new parameter.
- Drag the handle at the left of a row to reorder parameters, and the order you set is the order shown in your documentation.
- Right-click a row for a context menu holding Add Parameter, Edit, Move Up, Move Down and Delete.
Deleting a parameter asks for confirmation, and the action cannot be undone.
Deprecating a parameter
When a parameter is being retired, open its advanced settings and check Deprecated. Consumers see the deprecation marker in your documentation while the parameter still works, giving them time to migrate.
Reusing parameters
Some parameters appear on many endpoints, such as a pagination PageSize, a tenant header or a cursor. Define such a parameter once as a parameter component in the Components section of the sidebar, and it becomes the single source of truth for name, type, format and defaults. Specs imported from OpenAPI keep their referenced ($ref) parameters as parameter components, and each component tracks which endpoints use it. See Components.
Permissions
Editing parameters requires specs:write, which is included in the Member role. On a published, locked version the parameter table is read-only, so create a new version to make changes. See Versioning for that flow.
Related
- Endpoints — where parameters are defined
- Components — reusable parameter definitions
- Responses — the other half of the request/response contract
- Schemas — reusable structures for bodies and payloads