

Getting Started
Welcome to Routebase — the single source of truth for your APIs. This guide takes you from sign-up to your first documented endpoint in a few minutes.
1. Set up your workspace
Signing up starts on the Set up your workspace page at app.routebase.dev, which asks for one decision before you create your account: where your data lives.
Pick the European Union or the United States. Each card shows the hosting location, a latency hint, and a compliance note. You don't choose a workspace address — Routebase derives one from your organization name later, so there is nothing to check for availability.
A warning below the cards reminds you that the region cannot be changed later. Click Continue to create your account and confirm your email address from the verification email. If you skip verification, a banner in the app lets you resend the link at any time.
If you're unsure which region to take, read Region Selection first — it is the one decision here you cannot revise.
2. Complete onboarding
After your first sign-in, a short wizard asks how you will use Routebase — Personal (side projects, learning, personal APIs) or Business (team collaboration, professional API management) — and then has you name your workspace or organization and confirm the hosting region. Nothing is created until you finish the wizard.
Finishing it starts a 14-day Pro trial — no credit card required. The trial is granted once per person, not once per workspace, so a second account created from the same address starts on Free. Disposable email domains don't get a trial at all.
If someone has already invited you to their organization, you land on that invitation instead of the wizard — whether you open the mail in the same tab, on another device, or days later. Nothing is accepted for you; the page asks. Decline it and you continue into the wizard as normal.
The full wizard is covered step by step in Onboarding.
3. Create your first project
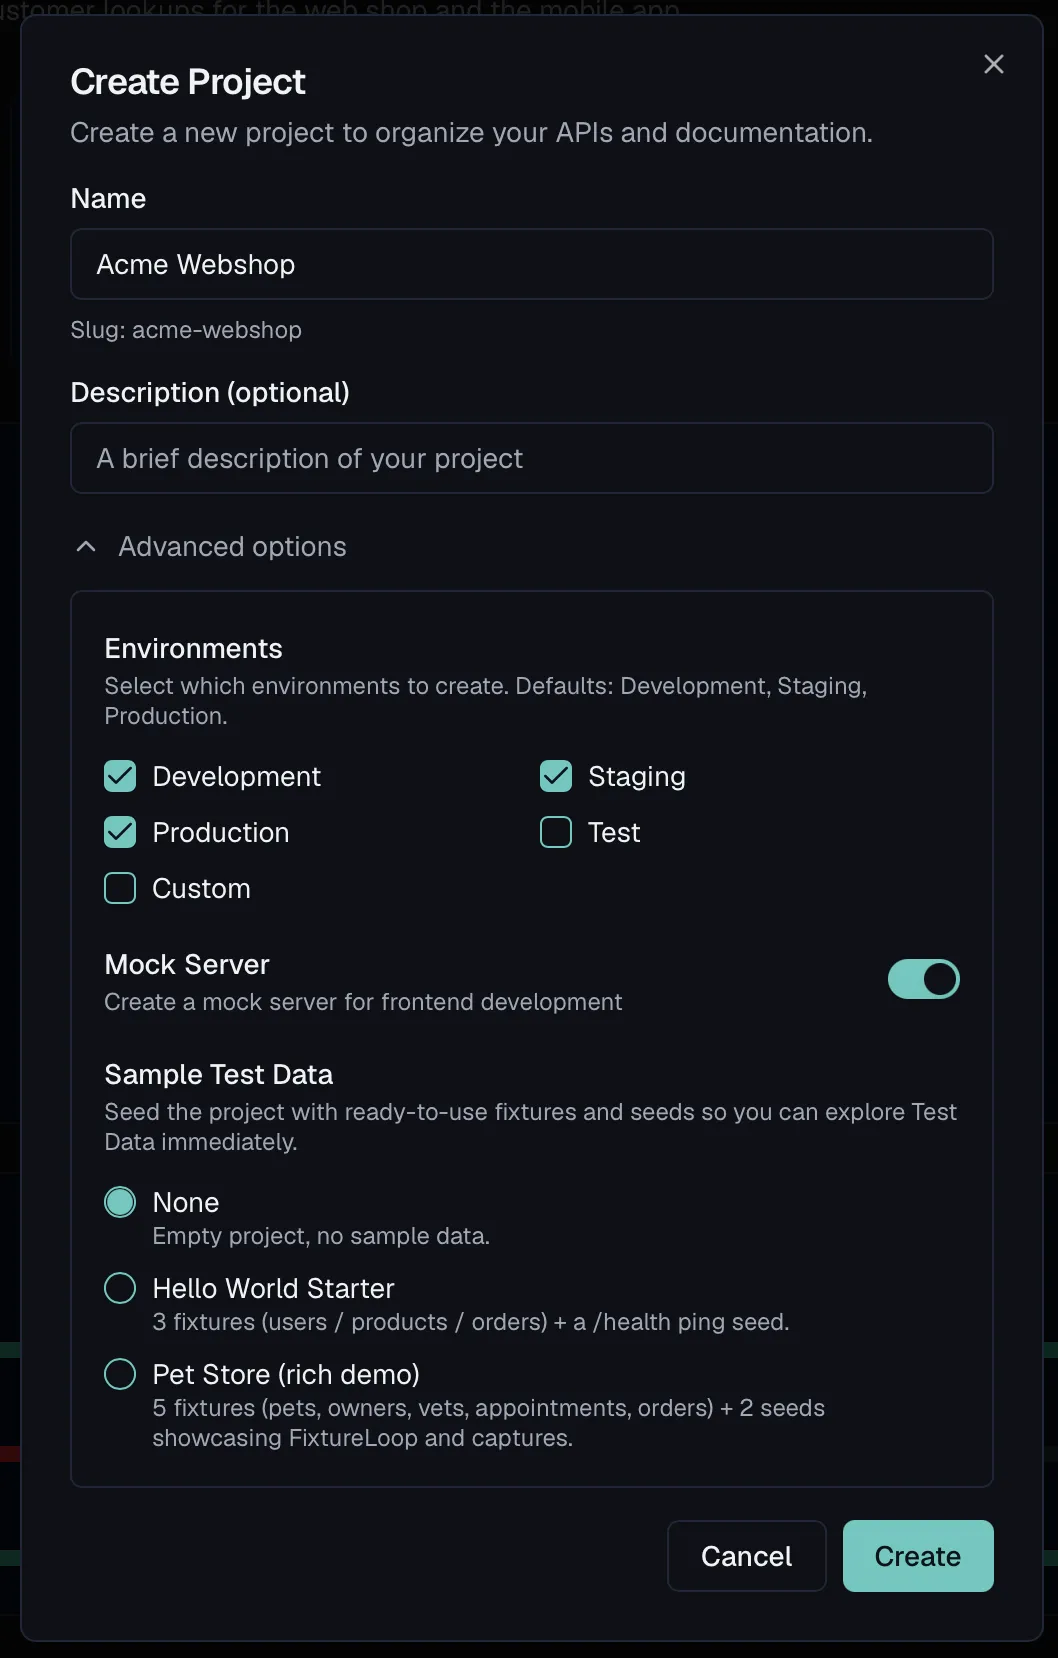
A project groups everything for one API: its specifications, environments, test suites, and mock server. After onboarding you land on the Dashboard, which greets a fresh workspace with two ways to start:
- Create Project — start fresh with a new API project. The dialog asks for a Name and an optional Description; under Advanced options you can pick which environments to create (defaults: Development, Staging, Production), enable a Mock Server, and seed Sample Test Data.
- Import OpenAPI — upload an existing OpenAPI file (YAML or JSON) and Routebase sets up the project, specification, and environments automatically from its contents. The file is validated first; if it doesn't pass, an inline error editor lists every problem, highlights the offending lines, and lets you fix and Re-validate the spec in place — with a one-click Retry as OpenAPI 3.1 quick fix when a 3.0 spec uses 3.1 features.
Arriving with a Postman or Insomnia export? This dialog takes OpenAPI only. Create the project first, then import the collection through the specification wizard in step 4 — that one reads all three formats.
Below those two cards sits Create with AI inside Routebase — a three-step setup that connects Claude or your IDE to this workspace over MCP. It's worth doing early: from then on your agent works on the same API you are about to design, with your exact permissions. See the MCP Quickstart. You can dismiss the card once you're set up.
Creating projects requires the projects:write permission. On the Free plan (after the trial ends), the New Project button is disabled once you reach the plan's project limit.
4. Add your first API specification
Inside a project, create a specification in one of three ways:
| Option | What it does |
|---|---|
| Import | Import OpenAPI, Postman, or Insomnia files. |
| Empty Specification | Start with a blank canvas and add endpoints. |
| Use Template | Start with a pre-built template (CRUD, Auth). |
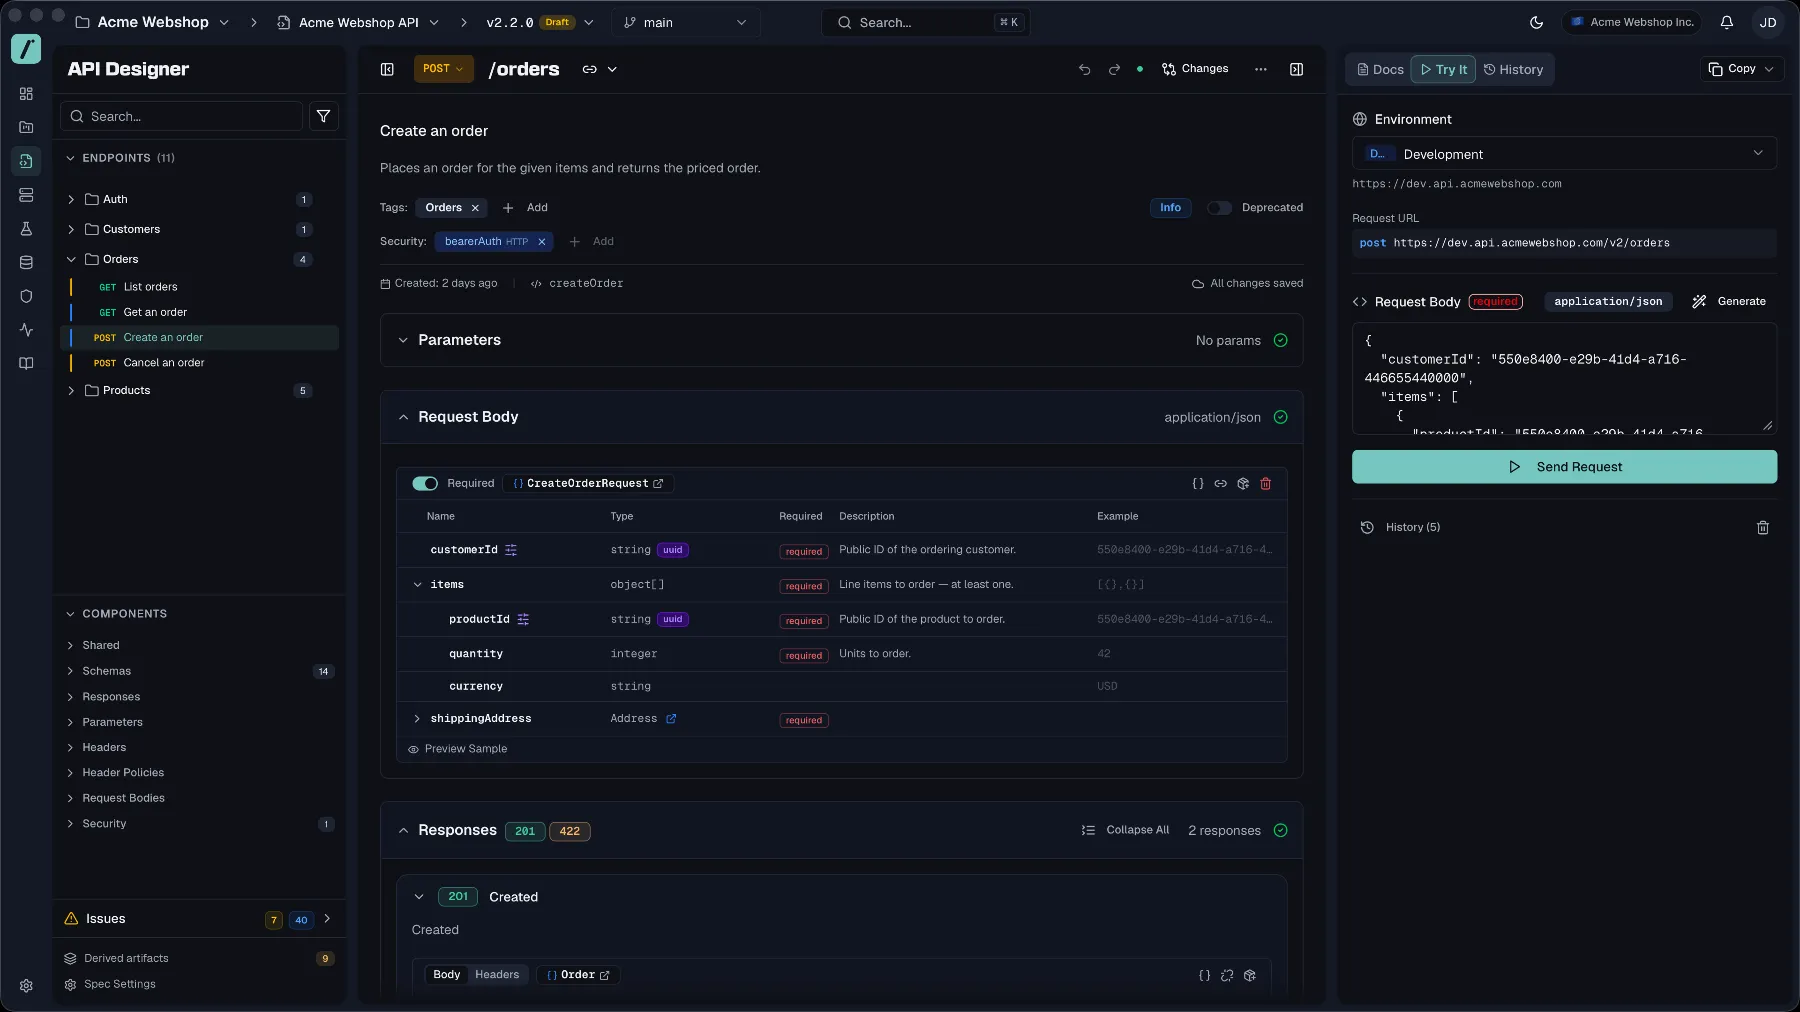
Either way, you then shape your API with:
- Endpoints — the operations your API exposes
- Parameters — the inputs each operation accepts
- Responses — what each operation returns
- Schemas — reusable data structures you reference across the spec

Next steps
You have a spec. The natural next question is what the other four stages do with it, and in which order — mock, test, document, agents.
Lifecycle Walkthrough answers exactly that: one small API carried through the whole cycle, showing where each stage hands off to the next. Read it once end to end; it is shorter than the five feature guides it replaces as a starting point.
If you would rather go straight to a single topic:
- Keep your live API honest with test suites and contract testing.
- Publish your documentation to a portal so consumers always have the current contract — see Publishing.
- Watch your endpoints in production with Monitoring.
- Connect your development tools through the MCP server — see the MCP Quickstart.
- Find anything, anywhere, with Global Search (
⌘K).
Welcome aboard — you now have everything you need to build your first API in Routebase.
Related
- Onboarding — the signup wizard in detail
- Region Selection — choosing between EU and US hosting
- Dashboard — your workspace home page
- Projects — organizing your APIs